
In this tutorial, I’m going to show you a quick trick that will enable you to paste an image into a Layer Mask in Photoshop. I’ll also show you a couple of ways that you can edit your mask and fine-tune the results.
To follow along, all you need is two images. The first is your main image, which is the one you’re going to apply the Layer Mask to. The second is your mask image, which is the one you’re going to paste into the Layer Mask.
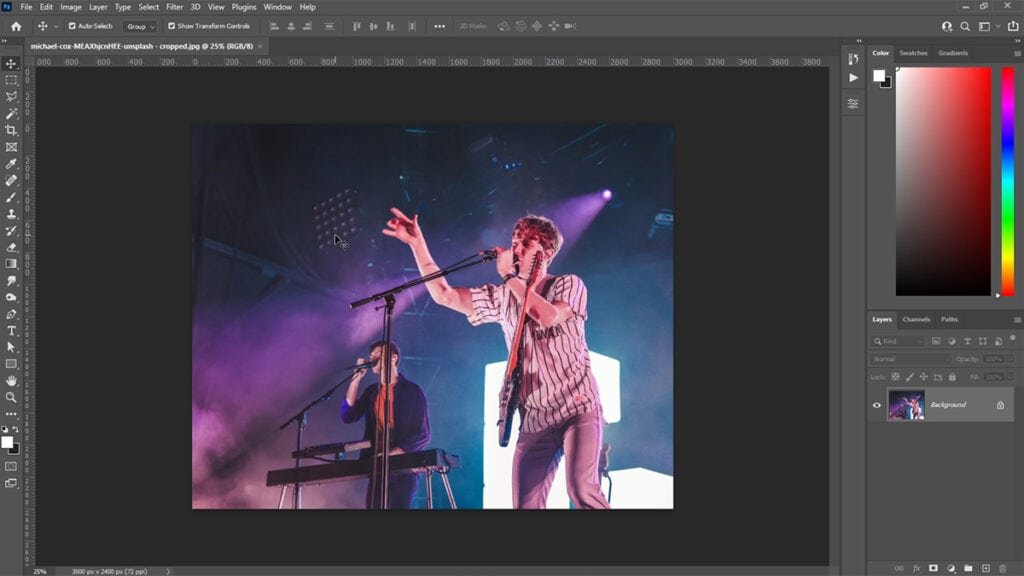
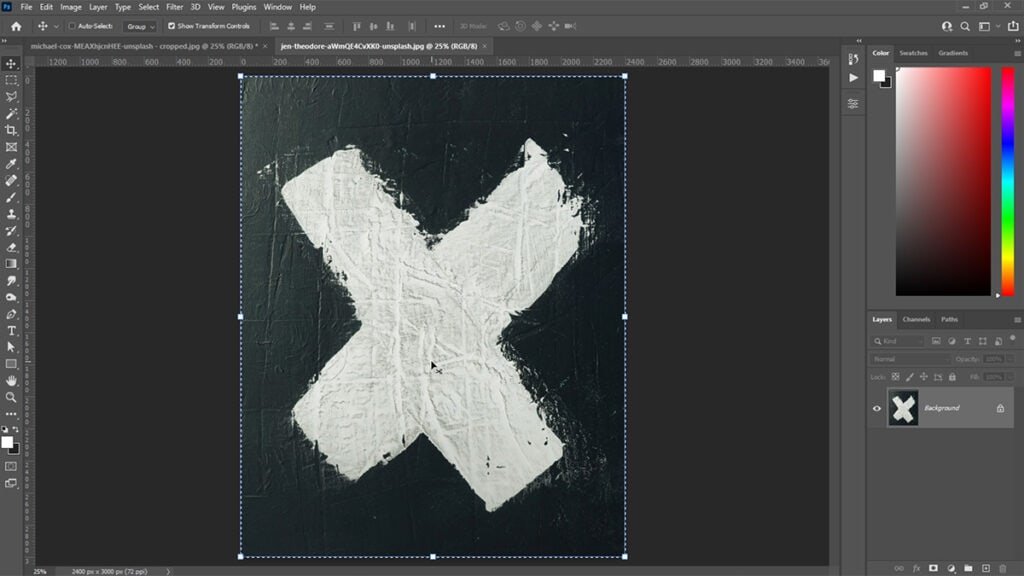
For my main image, I’m going to use a photo of a band performing live. For my mask image, I’m going to use an abstract paint texture.
If you’re not already familiar with Layer Masks, I highly recommend giving this article from the Adobe Photoshop User Guide a read first.
How to paste an image into a Layer Mask
Start by opening your main image in Photoshop.
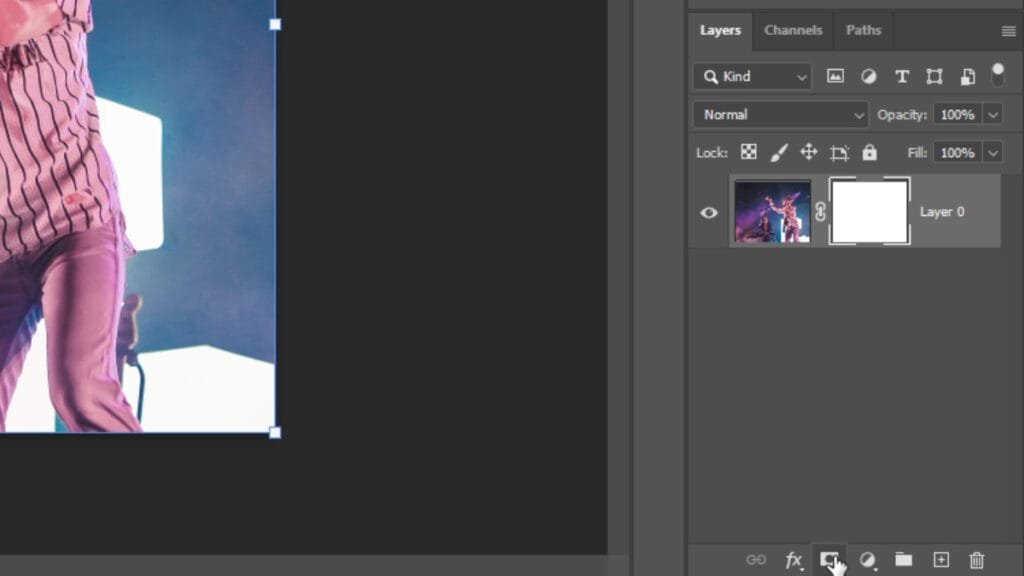
With the Background layer selected, click the Add Layer Mask icon at the bottom of the Layers panel (Window > Layers). You’ll see that there’s now a blank Layer Mask thumbnail next to the layer.
Next, press Cmd+O (Mac) / Ctrl+O (Windows) and open your mask image.

Press Cmd+A (Mac) / Ctrl+A (Windows) to select all, then Cmd+C (Mac) / Ctrl+C (Windows) to copy the image.
Go back to your main image. Hold Alt on your keyboard and click the Layer Mask thumbnail. This will open the Layer Mask.

Press Cmd+V (Mac) / Ctrl+V (Windows) to paste the image onto the canvas, then scale and position it accordingly.
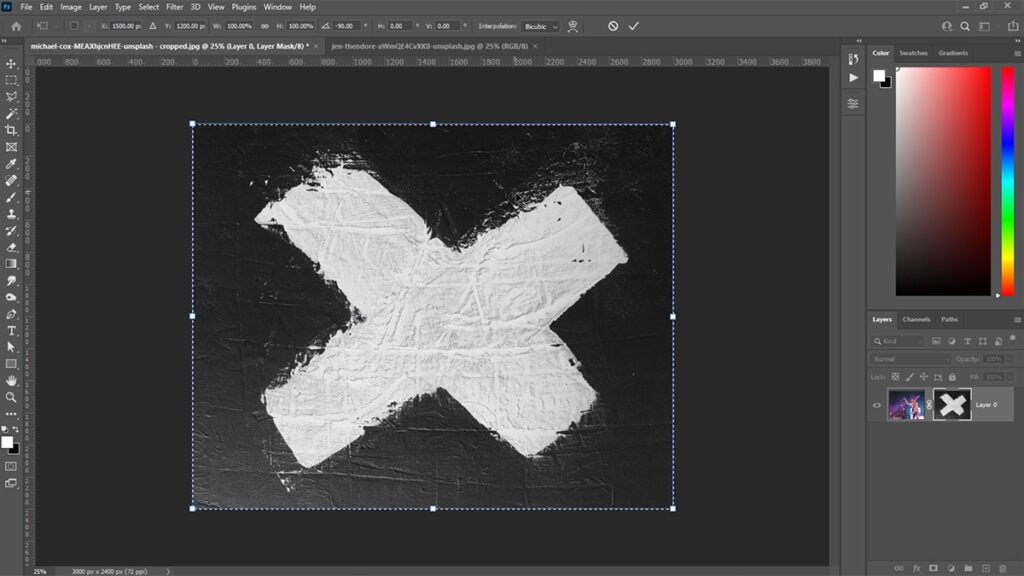
Following that, click the Layer thumbnail to close the Layer Mask and check out the results.

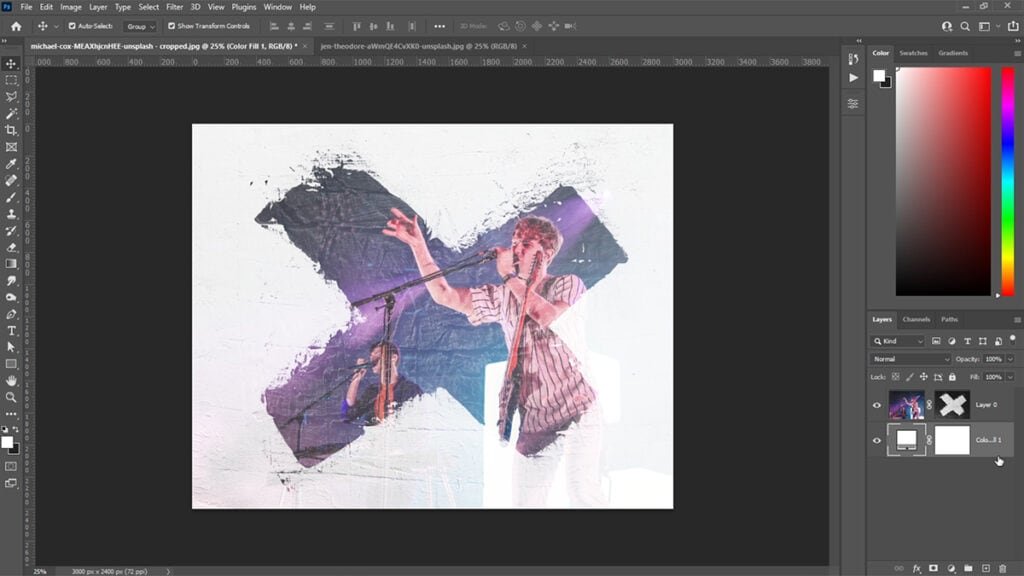
You’ll see that just like a mask created with Photoshop’s Brush and Selection tools, the black areas of your mask are hidden, the white areas are visible and the grey areas are somewhere in between.
How to edit your Layer Mask
So that we can see what we’re doing more clearly, let’s add a Solid Fill layer and put it behind our image.
To do this, click the Create new fill or adjustment layer icon in the Layers panel and select Solid Fill.
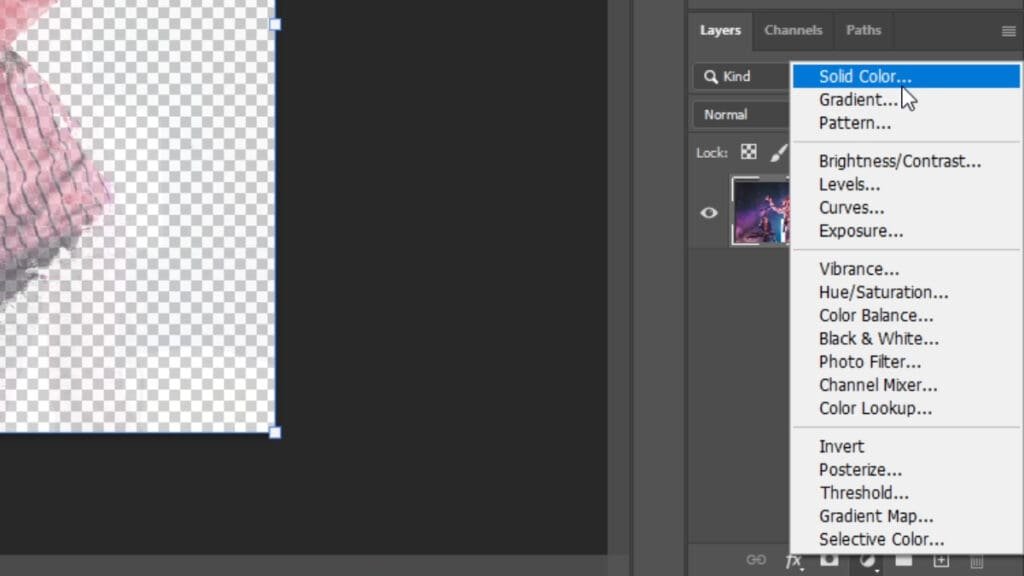
Choose white (#FFFFFF) from the Color Picker, then move the fill layer beneath your image in the Layer Stack.
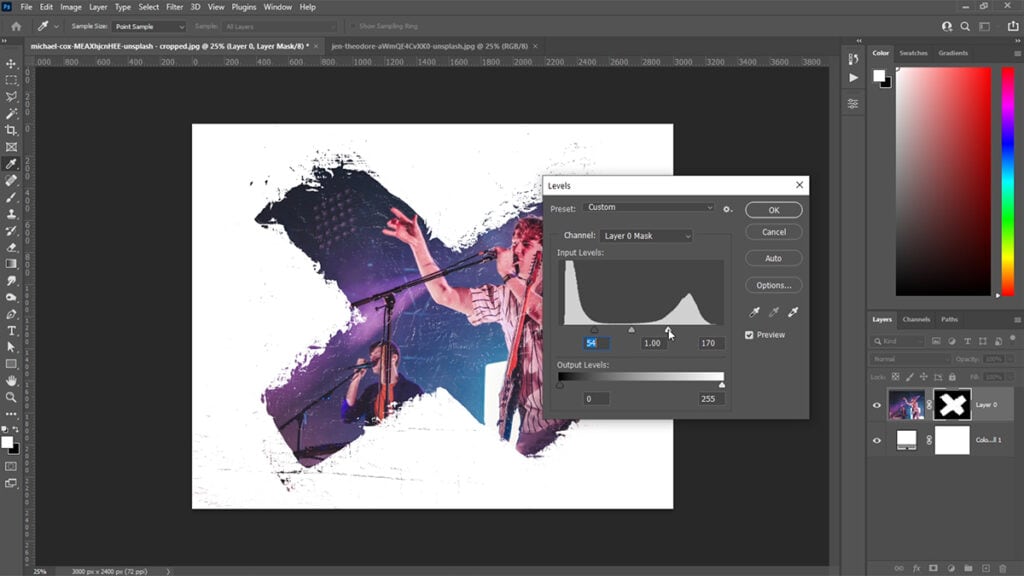
If like mine, areas of your image are only partially visible or hidden, you can correct this by using the Levels adjustment to increase the contrast of your Layer Mask.
To do this, click the Layer Mask thumbnail then press Cmd+L (Mac) / Ctrl+L (Windows) to open the Levels adjustment window. Gradually move both the black and white input levels towards the center. This will make the dark areas of your Layer Mask darker and the light areas of your Layer Mask lighter, which in turn will do a better job of hiding and showing certain areas of your image.
Try not to push the input levels too far or the mask will start to look pixelated.
You can refine your Layer Mask even further by painting over it with the Brush tool (B). Make sure that the Layer Mask thumbnail is still selected before doing this and remember, the areas you paint black will be hidden and the areas you paint white will be visible.
If it makes things easier, you can open the Layer Mask again by holding Alt and clicking the Layer Mask thumbnail.
In my example, I’ve painted over my Layer Mask to remove some excess texture from around the edges and in the center.
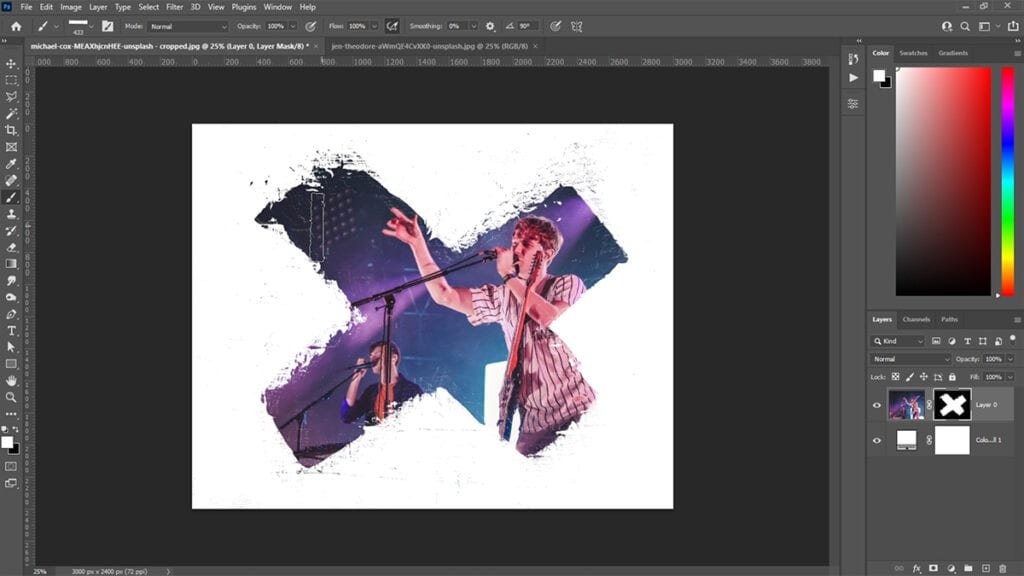
The result is a nicely masked image, created in no time, all thanks to being able to paste into a Layer Mask and use an existing image as a starting point for our mask.
I hope you’ve found this tip helpful. If you have any questions or would like to share examples of how you’ve made use of this tip, please feel free to use the comments section below.


0 Comments