
In this post, I’m going to show you how to save time by using template files in InDesign to kick-start your design projects and cut out repetitive file set up tasks.
What are template files?
Template files let you create useful starting points for series of documents where the process for setting up and laying out the document is likely to be very similar each time.
For example, you might regularly work on posters for a client whose brand guidelines include certain design and layout rules. These rules can dictate the colour of the background, size of the margins, placement of the logo and style of the text. Each time you create a poster, you’ll either repeat the same set up process or copy an old file and strip it back to what you need. Instead, you could create a template file where the basic layout is already in place, meaning all that you have to do is add new content.
How to create template files in InDesign
You create template files the same way as you create regular files. The only difference is in how you save them.
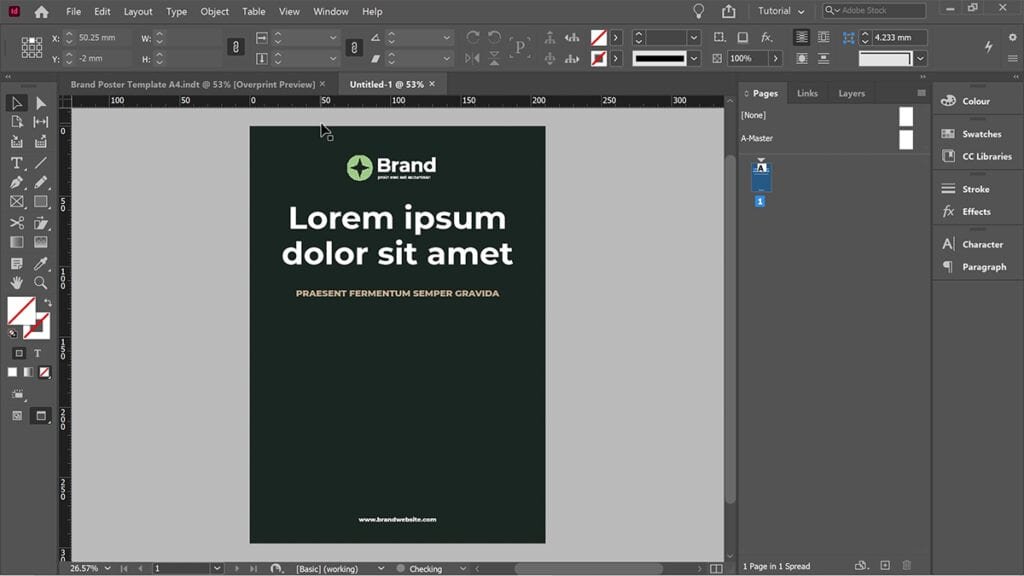
To demonstrate how to save a template file, I’m going to be using a pre-made document intended for use as an A4 poster template.

In it, I’ve added a background colour, set up the margins, added a logo, a placeholder heading, subtitle and web address.
You can download the document for free if you would like to follow along.
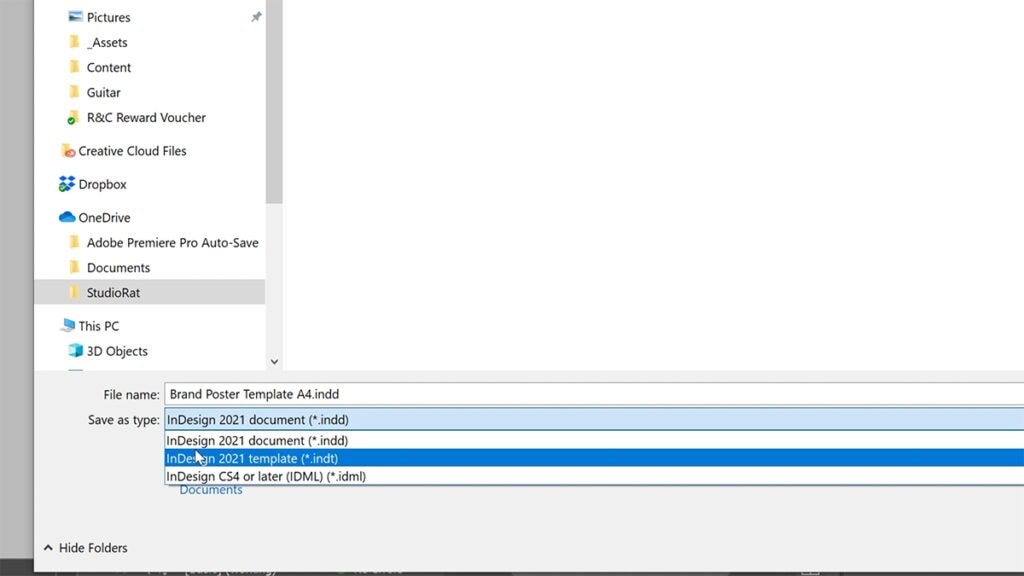
To save a document as a template, go to File > Save As.

Give your template an appropriate name and choose a folder to save it in. Don’t click Save just yet,
If you’re creating a template file for a clients’ brand, I’d recommend saving it in a folder alongside their other brand assets. If organising your design project files is something you feel like you need help with, feel free to check out the post I’ve written on the topic, here.
Now for the important bit. Underneath the file browser window, you’ll see there’s an option to change the document type. Change the type to InDesign 2021 template (*.indt) then click Save.
Your document has now been saved as a template file.
The difference between a regular InDesign file and a template file is that when you open a template file, InDesign doesn’t actually open the original template. Instead, it will create a new, untitled document with the layout and design elements from your template already in place.
This is really handy because not only does it save you time setting up your document but it also means that you can’t accidentally save over your original template.
How to edit template files in InDesign
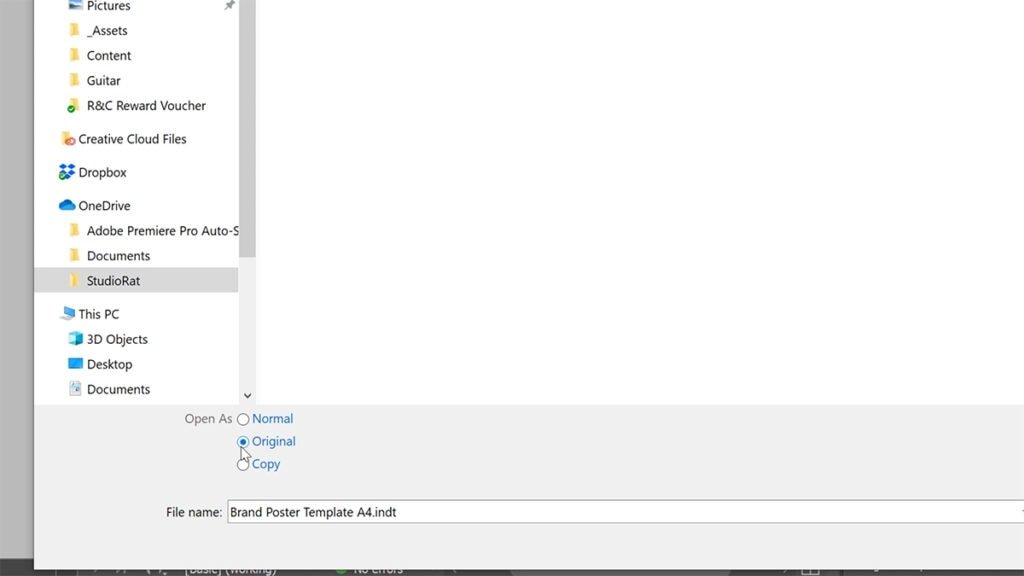
Because the default behaviour when opening a template file is to create a new document, to access and edit your original template, you need to open the file in a slightly different way.
To open the original template, go to File > Open, then find and select your template file.

Underneath the file browser window, you’ll see there’s options for how you can open the file. In this case, we want to open the original template, so select Open As: Original, then click Open.
Once you’ve made the necessary changes to your template, hit save and the next time you open the file, a new document will be created using the updated version of your template.
Ways to use template files in InDesign
Template files are ideal for any documents you create on a recurring basis. Some of the things I use them for include email newsletters, magazines, social media images and posters. Think about anything you produce on a weekly, monthly or even quarterly basis and you could probably benefit from setting up a template file.
I hope you’ve found this post helpful. If you have any questions or would like to share your thoughts, please use the comments section below.

0 Comments