Select Page

How to auto crop images in Photoshop

Mar 12, 2021 | Tips & Tricks | 0 comments

Auto crop images in Photoshop

When editing images in Photoshop, such as product shots or screenshots, there are often times when you need a tight crop with no excess pixels around the subject of your image. Using the crop tool for this usually means having to try and perfectly align the edges of the crop box to the edges of your subject, which isn’t always as straightforward as it seems.

Thankfully, Photoshop has a command called Trim, which is built for cropping tasks just like this.

Here’s how it works…

Let’s say you’ve removed the background from a product shot and need to remove the transparent pixels left around your image.

Product shot with no background in Photoshop

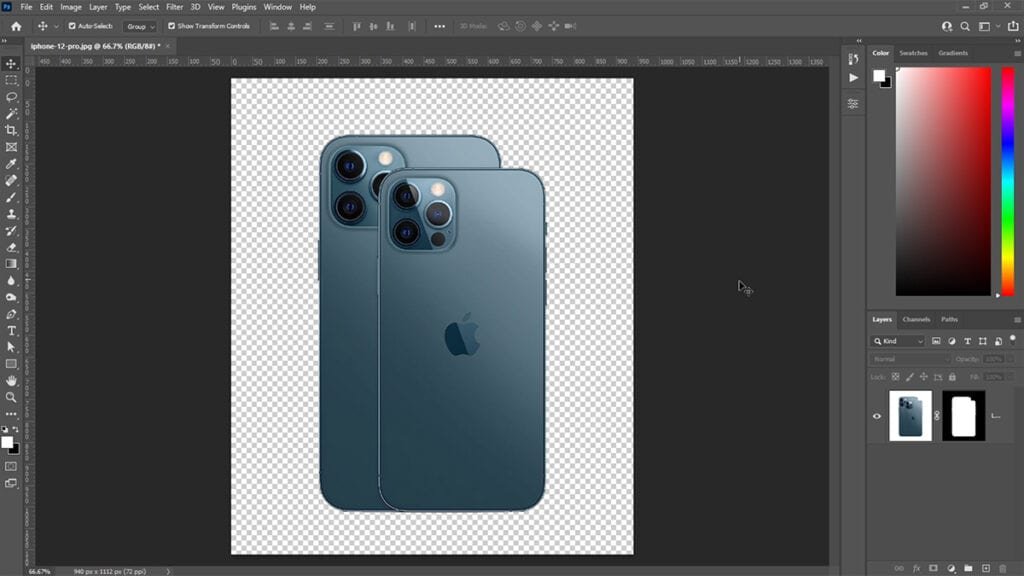
Rather than using the Crop tool, go to Image > Trim.

Selecting the Trim command in Photoshop

The Trim command enables you to automatically crop your image by trimming transparent pixels or by trimming the color of the pixel in the top left or bottom right corner of your image.

You can also choose which sides of your image you would like to Trim. This can be any combination of the Top, Bottom, Left and Right.

The Trim command window in Photoshop

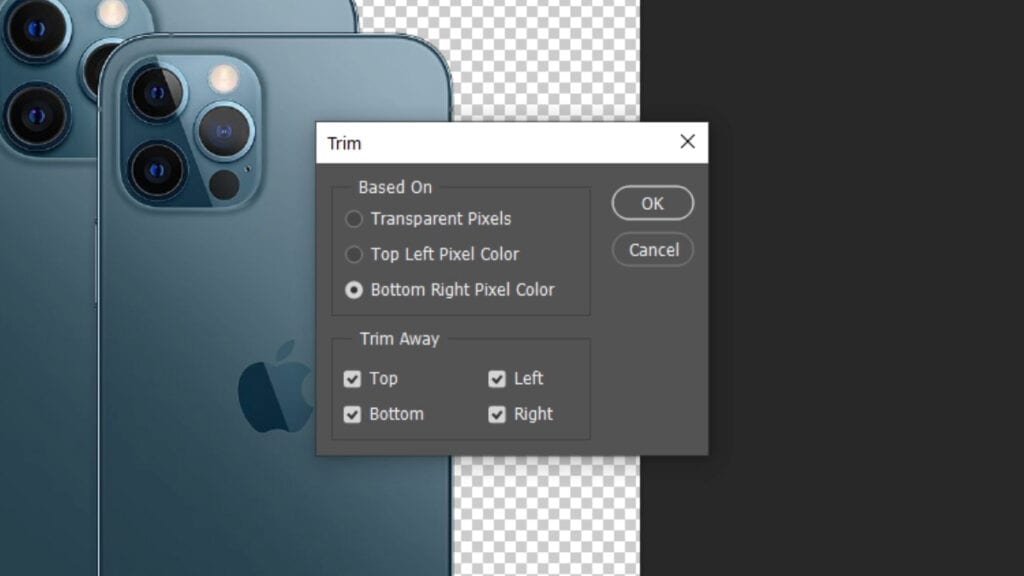
In this case, we need to trim the transparent pixels on all sides of the image. To do that, we’re going to choose to trim the image based on Transparent Pixels and trim away the Top, Bottom, Left and Right.

Choosing Trim command options in Photoshop

Once you’ve selected the appropriate options, click OK and your image will instantly be cropped.

Cropped product shot in Photoshop

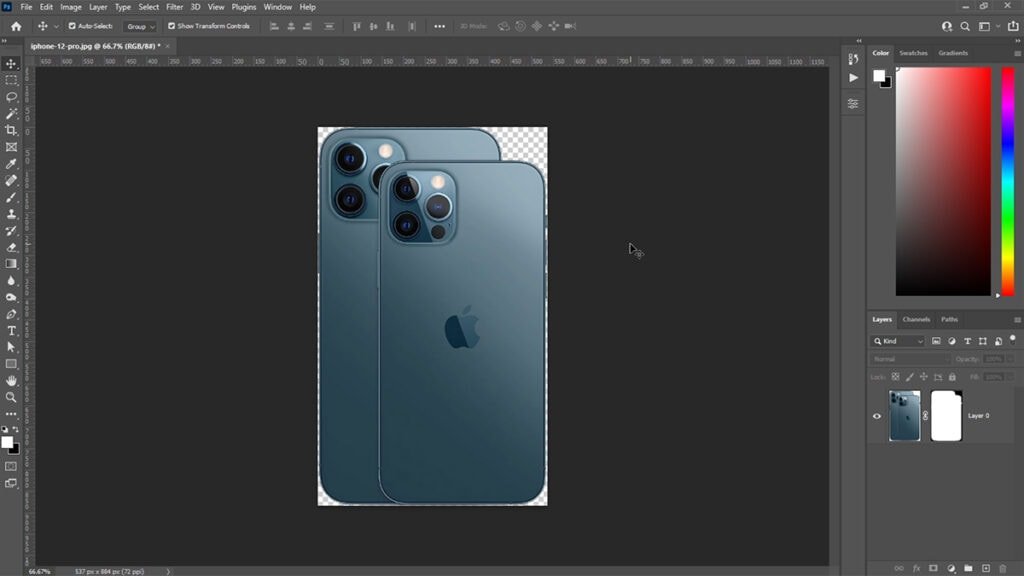
This works brilliantly with images that have a solid background too and is something I often use for tidying up screenshots.

Written by Sam Jones

Sam is a designer and creator based in Staffordshire, England. The founder of StudioRat, he loves to write about creative processes and share useful design tools, tips and resources.

Other posts you might like

How to create template files in InDesign

How to create template files in InDesign

In this post, I'm going to show you how to save time by using template files in InDesign to kick-start your design projects and cut out repetitive file set up tasks. What are template files? Template files let you create useful starting points for series of documents...

How to apply non-destructive Pathfinder effects in Illustrator

How to apply non-destructive Pathfinder effects in Illustrator

In this tutorial, I'm going to show you a trick that will enable you to apply Illustrator's Pathfinder effects non-destructively. By non-destructively, I mean in a way that won't destroy the shapes you're working with. Even after applying a Pathfinder effect, your...

How to copy layers from one Photoshop document to another

How to copy layers from one Photoshop document to another

In this tutorial, I'm going to show you two ways to copy layers from one Photoshop document to another, both of which have several advantages over copy and paste. The main advantages being: You can copy multiple layers or entire groups at once.Any Smart Objects, Smart...

0 Comments

Submit a Comment

Your email address will not be published. Required fields are marked *