
In this post, we’re going to take a look at a tool called FontBase—a font management app to help you more efficiently manage, find and preview fonts. I’ll explain what a font manager is and why you need one, as well as how to use FontBase and why I recommend it as your font manager of choice.
Why you should use a font manager
As a designer, the chances are you’ve got, or are on your way to building a fairly large font library. Whether you’ve got a few hundred fonts or a few thousand, without a font manager, you’ll need to install all of those fonts on your system to be able to use them. The problem is, the more fonts you install, the longer it’s going to take to load them all in apps like Photoshop and Illustrator.
Huge font lists can slow your computer to a crawl, but this can easily be avoided with a good font manager, which will enable you to use fonts without having to install them.
When using a font manager, you can store your fonts in a folder on your computer, then with a single click, you can activate them when you need them and deactivate them when you don’t. By being able to activate and deactivate fonts, you can keep font menus small and manageable, which in turn will save system resources and keep your machine running smoothly.
Font managers also let you sync your fonts across several devices, lowering the chance you’ll get caught out by a missing font when switching from one machine to another.
About FontBase
FontBase is a font management app available for Mac, Windows and Linux. It was created by designer Dominik Levitsky and has a beautiful, easy-to-use UI, that offers a ton of professional features to help you manage, find and preview fonts.
The standard version of the app is completely free to use and comes with all of the core features you would expect from a good font manager. Features include:
- Font Activation: Activate any font without the need to install.
- Search: Quickly and easily search for fonts by name.
- Collections: Create and manage collections of your fonts. Activate whole collections with a single click.
- Font Previews: Adjust text color, background, text alignment, font size and line height.
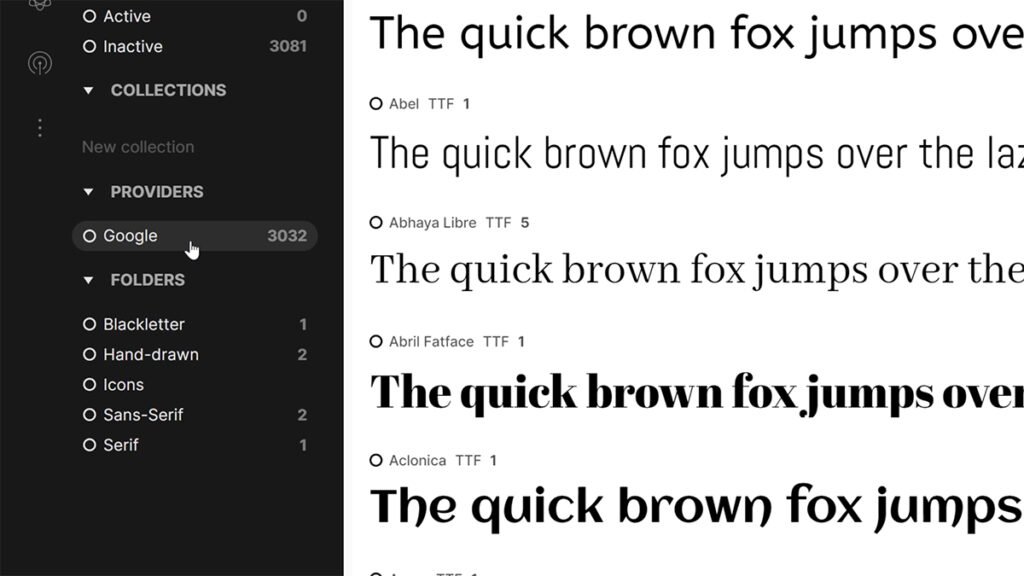
- Google Fonts: Use any font from Google’s font library. All pre-loaded and ready to use.
- Nested Folders: Sort fonts into subfolders and FontBase will mirror your file structure.
You can also pay for a FontBase Awesome subscription, which gives you access to advanced features, such as:
- SuperSearch: Find fonts based on properties such as x-height, contrast, weight, and more.
- Auto-activation: Missing fonts in your Photoshop, Illustrator or InDesign documents are activated automatically.
- Advanced Glyphs: View all of a fonts glyphs and copy them with a single click.
- Multiple Views: View fonts in a grid as well as a list.
- Themes: Switch between classic, dark and light app window themes.
- Tags: Manage and search your fonts using tags.
- Collection Sync: Sync your collections across devices using cloud services such as Dropbox and and OneDrive.

An Awesome subscription is just $3/month, $29/year, or a one time payment of $180 for lifetime access.
Today, we’ll be focusing on the features and benefits of the standard version but you can find out more about the Awesome features on the FontBase website.
How to use FontBase
Adding fonts to FontBase
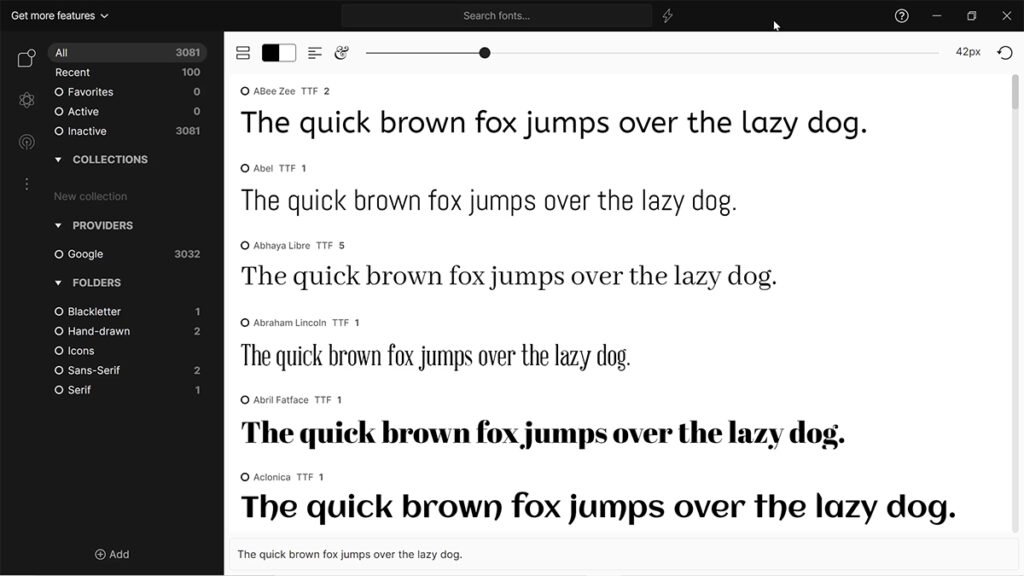
When you first launch FontBase, you’ll find that the entire Google Fonts library is made available for you to use.
You can also add your own fonts, which you can do by dragging and dropping font files/folders into FontBase.
This automatically copies the files to the FontBase root folder. This is where all of the fonts you add to FontBase are stored and can be found at /Users/USERNAME/FontBase on Mac, and C:/Users/USERNAME/FontBase on Windows.
To access the root folder, right click Folders and choose Open root folder.

This will open the root folder in finder/file explorer. Here, you can reorganise your fonts into folders based on classification, foundry, or any other method you prefer. The folder structure you create here will be reflected in the Folders section of FontBase.

Activating and deactivating fonts
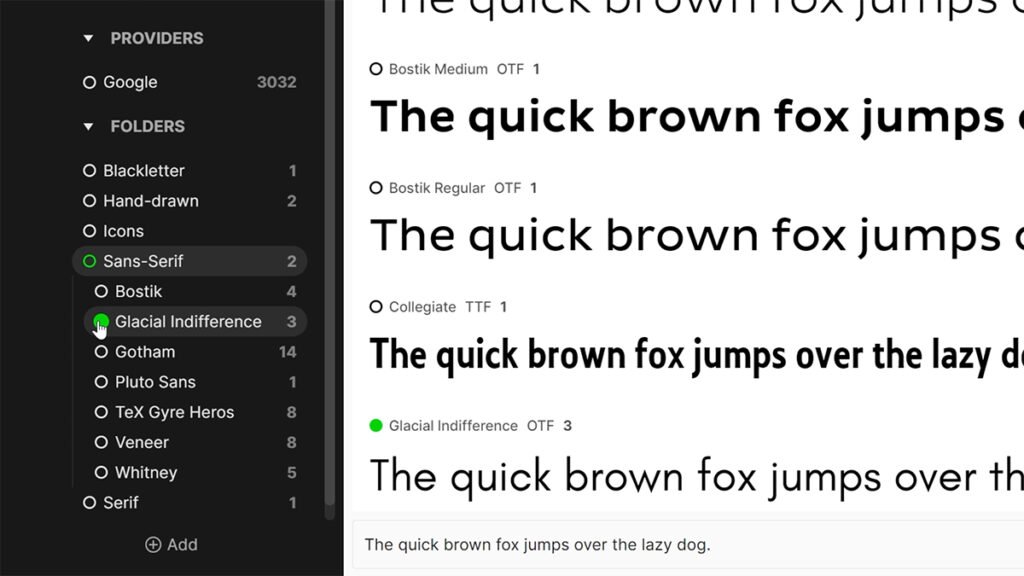
After adding fonts to FontBase, they are automatically marked as inactive, which is symbolised by the hollow white circle to the left of the font’s name.
To activate a font, click the circle and it will turn green to show that it has been activated.
Most apps should recognise the change immediately and will begin to display the newly activated font in the font menu.
All activated fonts will remain active whilst FontBase is open. When you close the app, all fonts are deactivated. That is until next time you launch the app, when all fonts that were previously active will automatically be re-activated, allowing you to pick up right where you left off.
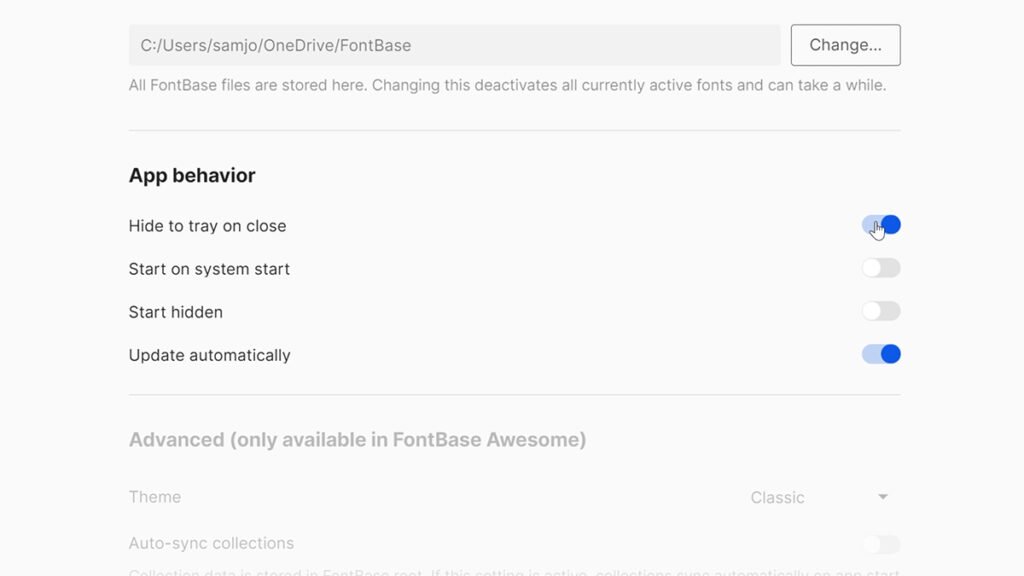
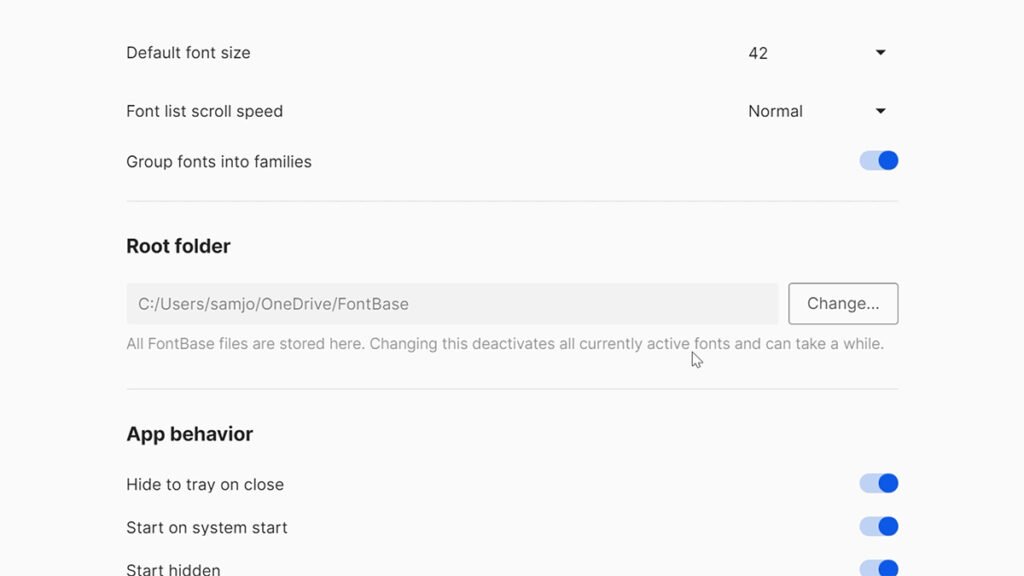
If rather than close the app, you just want to hide it, you can do so by going to Settings > App Behavior and turning on Hide to tray on close.
Now when you “close” the app, your fonts will remain active, but the app window will be hidden. You can open it again by clicking the FontBase icon in your system tray.
Whilst updating the App Behavior settings, I would also recommend that you turn on the Start on system start and Start hidden options, which will save you from having to manually open FontBase every time you turn on your computer.
Previewing fonts
The font preview panel on the right-hand side of FontBase gives you lots of options for previewing your fonts. Options include:
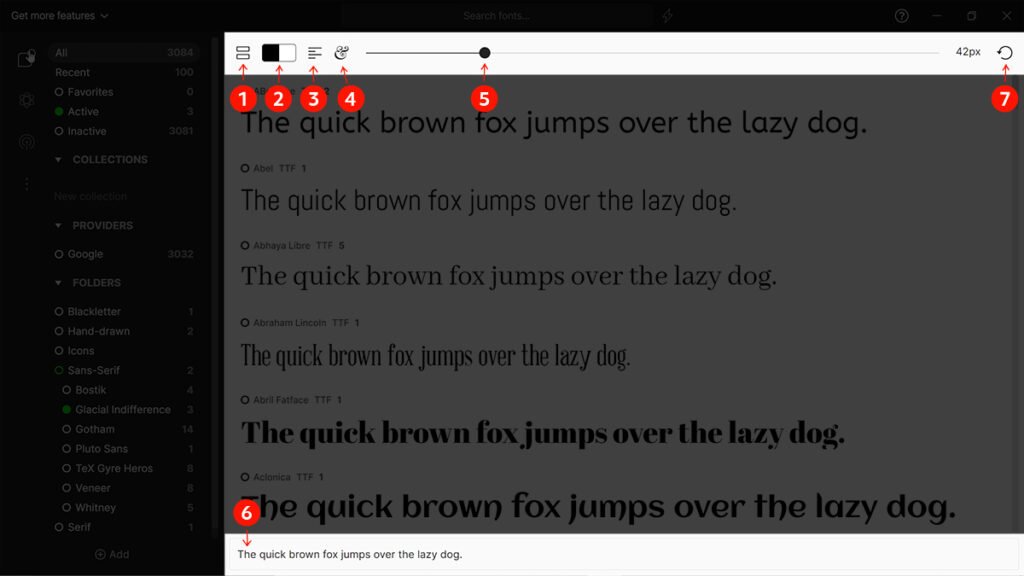
- Grid view: Preview fonts in a grid layout rather than a list. Available for Awesome subscribers only.
- Text and background color: Change the color of the background and sample text.
- Align text: Align the sample text to the left, right or center.
- OpenType features: Preview a font’s OpenType features such as ligatures, swashes and alternates.
- Text size: Use the slider to change the size of the sample text.
- Sample text: Change the default sample text (The quick brown fox jumps over the lazy dog) to a word or phrase of your own.
- Reset styles: Reset the font preview panel to the default settings.
Favoriting and Pinning fonts
When you hover over a font in the preview panel, two small icons will appear to the right. The heart icon allows you to favorite a font, which will add it to your Favorites list (found just beneath All in the menu on the left).
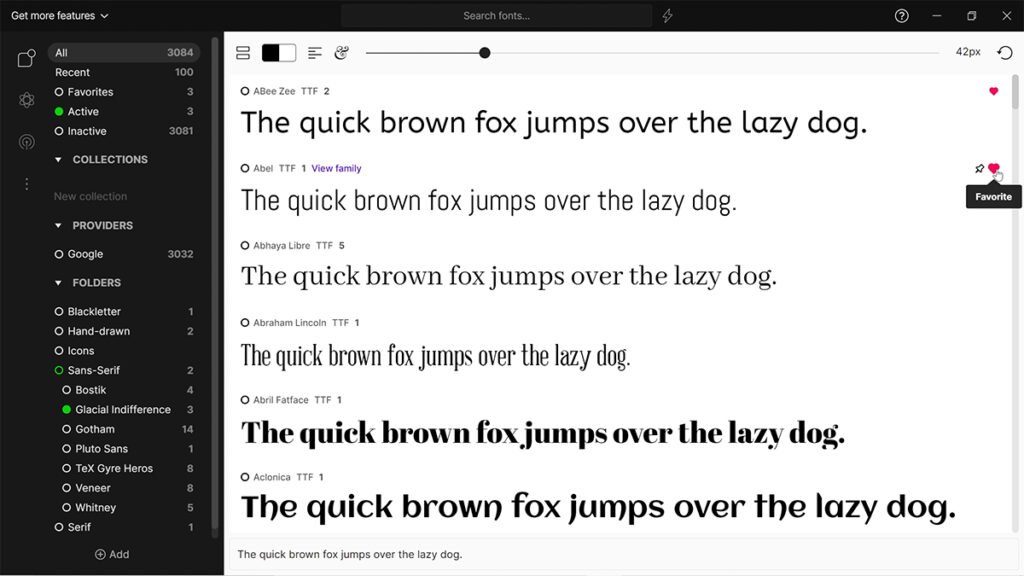
You can also pin a font, which will pin it to the top of the preview panel. This is really handy if you’ve found a font you like but want to quickly explore some other options to compare it against.
Creating collections
With collections, you can organise your fonts in a slightly more flexible way than you can with folders. For example, you can add a font to multiple collections without creating duplicates. You can also delete collections without removing the included fonts from FontBase. This makes collections ideal for organising fonts by project or style.
To create a new collection, click the New collection field, type the name of your collection and press enter.
To add fonts to a collection, drag them from the preview panel and drop them onto the collection name. You can select multiple fonts by holding Shift or Cmd (Mac) / Ctrl (Win).
Syncing fonts across devices
If you want to sync your fonts across devices, you can move your root folder to a cloud service like Dropbox or OneDrive.
To do this, go to Settings and change the Root folder location to a folder on your cloud drive. On your other devices, repeat the process, making sure to select the same folder.
Now your font library will be accessible from any of your devices.
It’s important to note that if you’re using the standard version of the app, only your Folders will be synced. To sync your Collections, you’ll need an Awesome subscription.
Is FontBase right for you?
To help you decide, I’ve put together a summary of the pros and cons of FontBase based on my personal experiences with the app.
Pros
- Fast and beautifully designed
- Free to use
- Syncs fonts between devices
- Affordable premium features
- Regular free updates
- Good support
It was only recently that I had my first experience with support at FontBase, after running into a small issue with InDesign not recognising FontBase as a valid plugin. I emailed support and Dominik (the founder) got back to me with a solution the same day. The app has since been updated, fixing this issue for all users. - Automatically imports all Google Fonts
Cons
- Fonts added via FontBase don’t get added to packaged Adobe files
This means you either have to install the font on your system before running the Package command, or you have to copy the fonts to your packaged files once they’ve been created. Neither is ideal, especially if packaging files is something you do quite often.
Conclusion
I’ve been using FontBase for over 12 months now and I can’t recommend it enough, especially if you’re using Windows, which doesn’t have any font management software built in. At least if you’re using a Mac, you have Font Book, but still, I would encourage you to give FontBase a try.
Personally, I much prefer the way FontBase handles font activation and the way it allows me to organise my fonts. I use it on both my desktop PC and my MacBook Air, and the sync features make switching between the two almost seamless. The fact that the standard version is free is just the cherry on the cake.
To download FontBase, visit the FontBase website.


0 Comments